
Cheesy Sweet Potato Stacks

Layered rounds of seasoned sweet potato, baked until tender and finished with melted cheese and fresh herbs — an easy, crowd-pleasing side or light main.

This simple stack of sweet potato rounds became a household favorite the first time I made it for a casual Sunday dinner. I discovered the technique while experimenting with ways to turn pantry staples into something that looked special on the plate without adding fuss. The combination of tender, slightly caramelized sweet potato edges with a sprinkle of cheddar and fresh herbs is unexpectedly celebratory — it feels like comfort food dressed up for company. I love how the layers hold together when baked and how each bite delivers a sweet, savory, slightly crisp edge.
I first served these at a small family gathering on a rainy afternoon. The aroma of roasted sweet potatoes and garlic powder filled the kitchen, and people kept reaching for the baking sheet long before the stacks were plated. What makes this preparation special is its balance: the sweet base of the tuber, a touch of smokiness from paprika, and a creamy, melty topping that contrasts nicely in texture. Because it’s so easy to scale, it’s my go-to when I need a vegetable that doubles as a statement dish.
Why You'll Love This Recipe
- Ready with minimal hands-on time — about 15 minutes of prep and roughly 30 minutes in the oven for a total of just over 40 minutes from start to finish.
- Uses pantry-friendly ingredients: sweet potatoes, olive oil, common spices, and a cup of shredded cheese you likely have on hand.
- Adaptable for gatherings — make small stacks as individual servings, or double the batch for a crowd without changing technique.
- Make-ahead friendly — you can slice and season the rounds a day ahead, then assemble and bake before serving to save time.
- Vegetarian and naturally gluten-free, making it suitable for several dietary needs with a simple swap for dairy-free cheese if needed.
In my kitchen this dish consistently wins praise from picky eaters and vegetable lovers alike. The first time I added chives on top, my partner declared it a new holiday side; since then, it’s appeared at small dinner parties and weeknight meals alike. The stacks always look more elaborate than they are, which is why I reach for this method when I want something pretty but practical.
Ingredients
- Sweet potatoes (2 large): Choose firm, smooth-skinned tubers of similar size so they slice evenly. I prefer garnet or Beauregard varieties for their deep orange color and inherent sweetness.
- Olive oil (2 tablespoons): Use a good-quality extra virgin olive oil for flavor and browning; it helps the edges caramelize without becoming greasy.
- Garlic powder (1 teaspoon): Provides an even, toasty garlic note without the risk of raw garlic pockets. If using fresh garlic, minced 1 clove will work — add carefully to avoid burning.
- Paprika (1 teaspoon): Adds a subtle smoky warmth; smoked paprika deepens the flavor even more if you prefer a bolder profile.
- Salt and pepper to taste: I usually start with 1/2 teaspoon kosher salt and 1/4 teaspoon freshly ground black pepper and adjust after baking.
- Shredded cheese (1 cup): Cheddar is classic for its sharpness and melting quality; Monterey Jack or a blend works beautifully. Use a good-quality block cheese shredded at home for the best melt.
- Fresh herbs: Parsley or chives are ideal for garnish; their brightness lifts the richness of the cheese and roasted sweet potato.
Instructions
Preheat the oven: Set the oven to 400°F (200°C) so it is fully heated when the prepared stacks go in. A properly preheated oven gives good initial heat for edge caramelization and even cooking through the rounds. Prepare the sweet potatoes: Peel and slice the potatoes into 1/4-inch rounds using a sharp chef’s knife or a mandoline for uniform thickness. Uniform slices ensure even cooking; if some slices are thicker, place them toward the center of each stack where heat is steadier. Toss with oil and seasonings: In a large bowl, combine 2 tablespoons olive oil, 1 teaspoon garlic powder, 1 teaspoon paprika, salt, and pepper. Add the rounds and gently toss until each slice is evenly coated. Light coating prevents sogginess and encourages crisping at the edges. Assemble stacks: Line a baking sheet with parchment paper. Create individual stacks of 3 to 4 slices each in a single layer, allowing a little space between stacks for air circulation. Press gently so the layers sit flat but don’t compress them — the air gaps help the interior cook through. Bake until tender: Bake the assembled stacks for 25 to 30 minutes. Look for tender centers when pierced with a fork and lightly golden edges; if edges brown too quickly, lower the temperature by 25°F and extend the time slightly. Add cheese and finish: Remove the pan from the oven and top each stack with a generous sprinkle of shredded cheese (about 1 cup total distributed). Return to the oven for an additional 5 to 7 minutes, until cheese is melted and bubbly. For a browned top, switch to the broil setting for the last 1 minute, watching carefully to avoid burning. Rest and garnish: Allow the stacks to cool for 3 to 5 minutes so they set slightly, then garnish with freshly chopped parsley or chives and serve warm.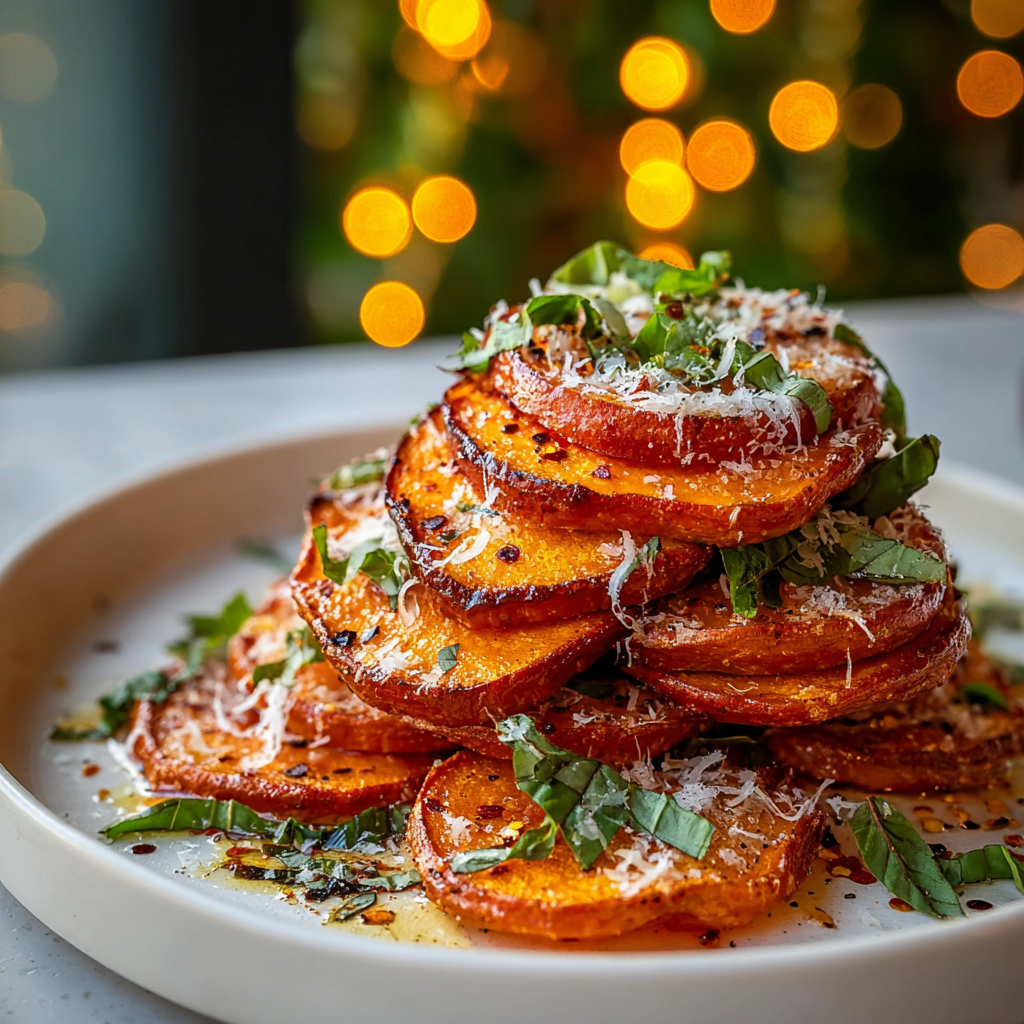
You Must Know
- These stacks freeze well for up to 3 months if par-baked and frozen flat on a sheet before stacking and final cheese bake.
- A single serving (approximate) contains about 220 calories depending on cheese choice; it’s a nutrient-dense portion with vitamin A from sweet potatoes.
- Leftovers keep in the refrigerator for 3 to 4 days; reheat in a 350°F oven for 8 to 10 minutes to preserve texture rather than microwaving, which can make them soft.
- If you need dairy-free, swap in a plant-based shredded cheese and note the flavor profile will be milder but still satisfying.
My favorite aspect of this preparation is how visually appealing the plated stacks are with very little effort. At a potluck, they disappear quickly because they look elegant yet are perfectly finger-food friendly when made in small towers. Friends often ask for the technique rather than a precise measurement — which is the highest compliment for a simple method.
Storage Tips
Store cooled stacks in an airtight container in the refrigerator for up to 4 days. To freeze, flash-freeze the baked but uncheesed rounds flat on a baking sheet for an hour, then transfer to a freezer bag; when ready to use, thaw in the refrigerator and finish with cheese in a 375°F oven until hot and bubbly. For best texture, re-crisp on a baking sheet rather than microwaving; use a rack set over the sheet if you want extra airflow underneath.
Ingredient Substitutions
If you don’t have cheddar, Gruyère or fontina provide a more complex, slightly nutty melt. For a smokier profile, replace regular paprika with smoked paprika at a one-to-one ratio. To make this dairy-free, use a firm tofu ricotta or a plant-based shredded cheese; expect a slightly different mouthfeel but similar visual appeal. If sweet potatoes are unavailable, use Yukon gold potatoes but reduce oven time and check for tenderness sooner.
Serving Suggestions
Serve as a side alongside roasted chicken or grilled salmon, or present as a vegetarian main with a crisp green salad and a tangy yogurt-based sauce. Garnish with lemon zest for brightness or a drizzle of balsamic reduction for a richer finish. For a brunch twist, top a stack with a soft-poached egg and a scattering of chives.
Cultural Background
Root vegetables roasted with spices and cheese have roots across many cuisines where simple ingredients are elevated by technique. Sweet potatoes are central to American seasonal cooking, especially in the South and during holidays, and this stacked presentation borrows the idea of layered vegetables common in gratins and tian preparations, updated for a casual, individual serving style.
Seasonal Adaptations
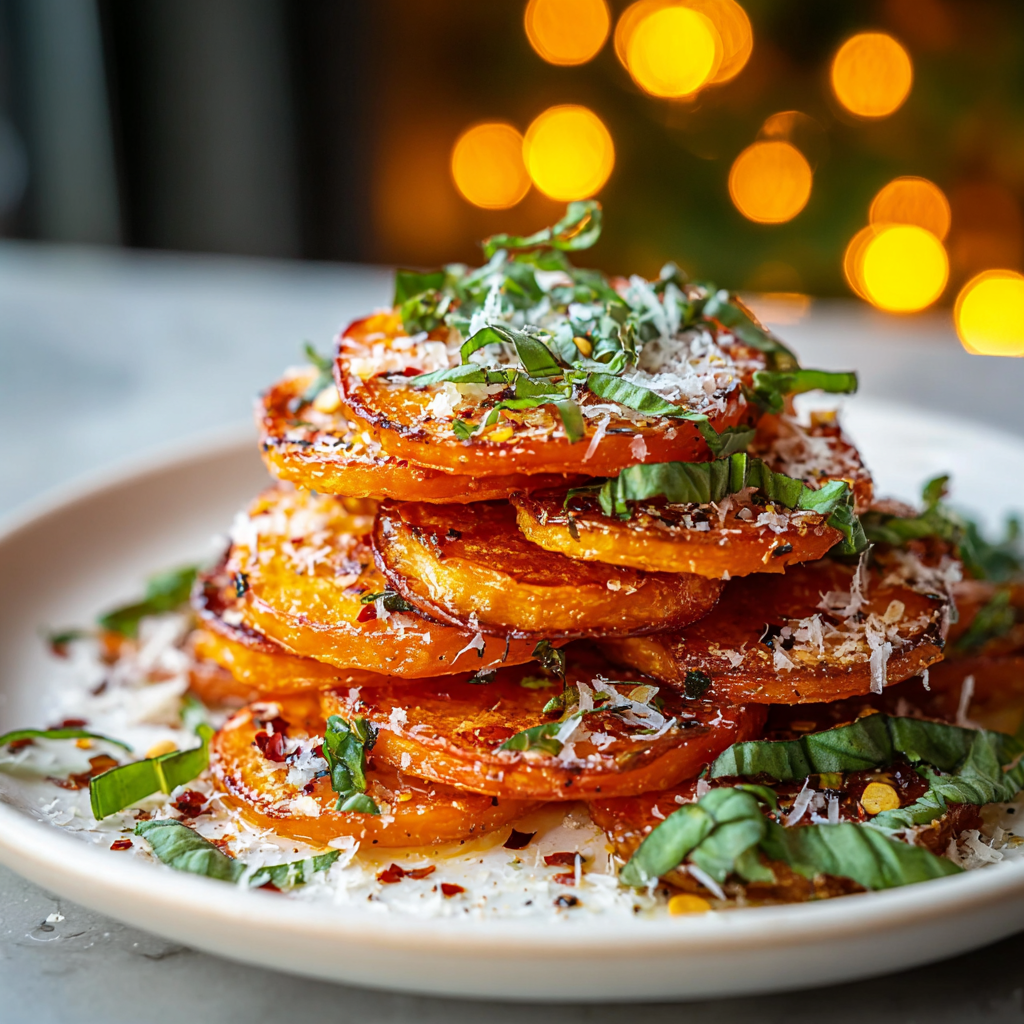
In fall and winter, boost warming spices with a pinch of cinnamon or nutmeg added to the seasoning mix. For spring and summer, use lighter cheeses like ricotta stirred with lemon zest, and top stacks with fresh herbs like basil or mint to brighten the plate. For holiday gatherings, add toasted pecans between layers for crunch and a festive touch.
Meal Prep Tips
Slice and season the rounds up to 24 hours ahead and store them in an airtight container in the refrigerator to save evening prep minutes. Assemble stacks on the sheet right before baking to keep them tidy. If cooking for meal prep lunches, bake full-size stacks and cool completely before dividing into meal containers; reheat in an oven or toaster oven to retain texture.
These stacks are a small celebration of how technique and a few thoughtful ingredients can elevate a humble tuber. Give the method a try, and make it your own with different cheeses, herbs, and toppings — the approach is forgiving and endlessly adaptable.
Pro Tips
Slice potatoes uniformly (1/4 inch) for even cooking; a mandoline makes this quick and consistent.
Press stacks gently but do not compress; small air gaps help the interior cook evenly.
If edges are browning too quickly, reduce oven temp by 25°F and extend bake time.
Shred cheese from a block for best melting and flavor; pre-shredded cheese often contains anti-caking agents that affect melt.
Allow stacks to rest 3 to 5 minutes after baking so they set and hold together when served.
This nourishing cheesy sweet potato stacks recipe is sure to be a staple in your kitchen. Enjoy every moist, high protein slice — it is perfect for breakfast or as a wholesome snack any time.
FAQs about Recipes
Can I prepare the sweet potato slices ahead of time?
Yes. You can slice them up to 24 hours ahead and keep them refrigerated, or par-bake slices and freeze for longer storage.
How do I adjust cooking time for thicker slices?
Bake at 375°F for a few minutes longer if using thicker slices, and watch closely if broiling to finish the cheese so it doesn't burn.
Tags
Cheesy Sweet Potato Stacks
This Cheesy Sweet Potato Stacks recipe makes perfectly juicy, tender, and flavorful steak every time! Serve with potatoes and a side salad for an unforgettable dinner in under 30 minutes.
Instructions
Preheat the oven
Preheat oven to 400°F (200°C) so it’s fully heated when you place the prepared stacks inside. Proper initial heat helps edges caramelize.
Slice and season
Peel and slice sweet potatoes into 1/4-inch rounds. Toss slices in a bowl with 2 tablespoons olive oil, 1 teaspoon garlic powder, 1 teaspoon paprika, salt, and pepper until evenly coated.
Assemble stacks
Line a baking sheet with parchment and arrange stacks of 3 to 4 slices each, spaced slightly apart. Press gently to settle layers but avoid compressing them.
Bake until tender
Bake for 25 to 30 minutes until tender through and lightly golden on the edges; test doneness with a fork.
Add cheese and finish
Remove from oven, top each stack with shredded cheese, and return to bake for 5 to 7 minutes until cheese melts and bubbles. Optionally broil 30–60 seconds for a browned top, watching closely.
Rest and garnish
Allow to cool for 3 to 5 minutes to set, then garnish with chopped parsley or chives and serve warm.
Last Step: Please leave a rating and comment letting us know how you liked this recipe! This helps our business to thrive and continue providing free, high-quality recipes for you.
Nutrition
Did You Make This?
Leave a comment & rating below or tag
@snapyrecipe on social media!
Categories:
You might also like...

5-Minute Thanksgiving Appetizers That Wow Every Guest
A fast, elegant bite for Thanksgiving: creamy cheese, bright cranberry, crunchy pecans and rosemary on crackers or baguette — ready in five minutes and loved by all.

Air Fryer Bang Bang Chicken Skewers
Crispy air-fried chicken skewers tossed in a creamy, sweet-spicy bang bang sauce — a quick, crowd-pleasing weeknight favorite.

Air Fryer Honey Butter Garlic Chicken Tenders
Crispy air-fried chicken tenders coated in a sticky honey-butter garlic glaze — quick, family-friendly, and ready in about 25 minutes.
Did You Make This?
Leave a comment & rating below or tag @snapyrecipe on social media!
Rate This Recipe
Share This Recipe
Enjoyed this recipe? Share it with friends and family, and don't forget to leave a review!
Comments (1)
This recipe looks amazing! Can't wait to try it.
Comments are stored locally in your browser. Server comments are displayed alongside your local comments.
Hi, I'm Natalia!
What's Popular

Get My 30-Minute Meals email series!
Quick and easy dinner ideas delivered to your inbox.