
Easy One Pot Pizza Sliders

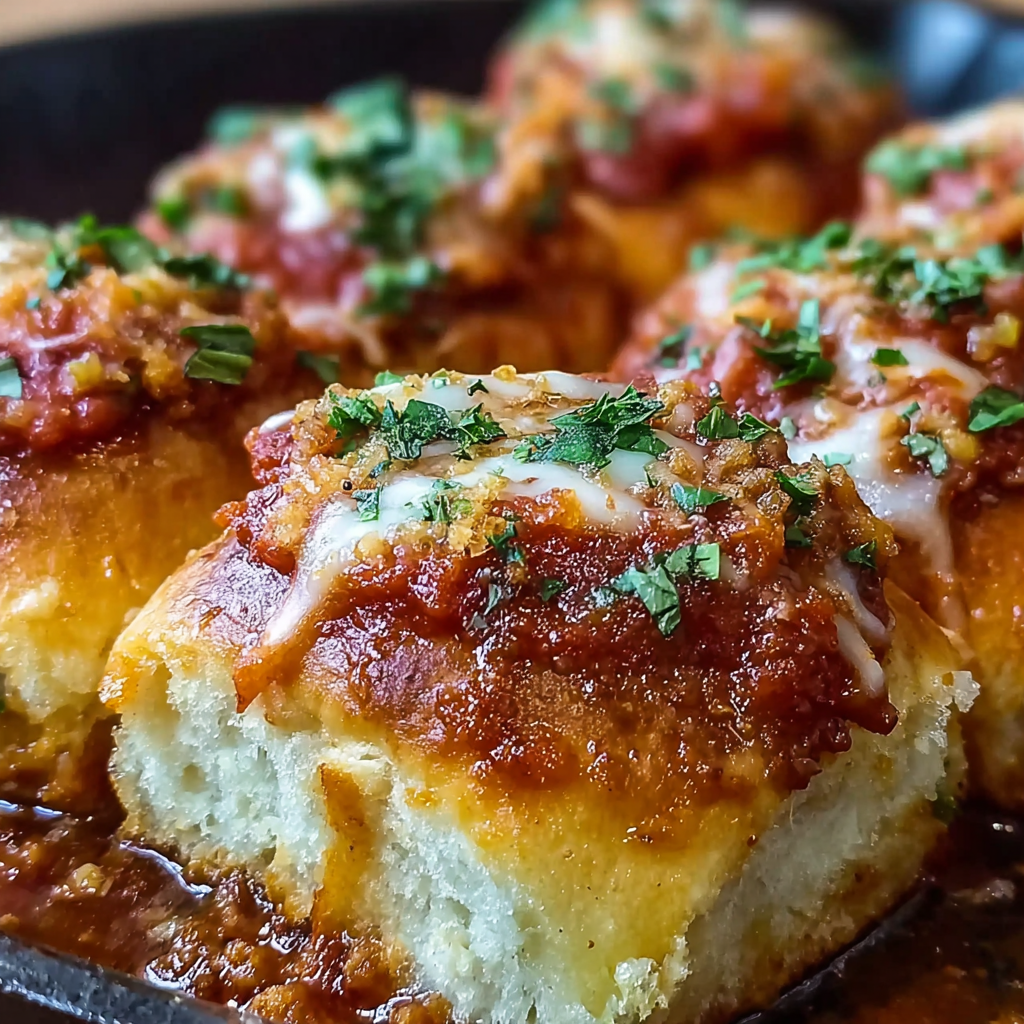
A fun and fuss-free party favorite: savory meat, bubbling mozzarella, and classic pizza toppings layered on soft slider buns and baked together in one dish.
This recipe for Easy One Pot Pizza Sliders arrived in my kitchen on a busy Friday night when I needed something fast, crowd-pleasing, and utterly comforting. I discovered the combination while experimenting with leftover marinara and a pack of slider buns; the idea of turning pizza into hand-sized sandwiches baked together in one vessel felt impossibly appealing. The first time I served these to friends, the kitchen turned into a stadium of satisfied noises as each bite delivered warm marinara, melted cheese, and crispy pepperoni edges. It quickly became a rotating favorite for game nights and casual get-togethers because it tastes indulgent but requires minimal hands-on time.
What makes this version special is the simplicity and the texture contrast: soft, slightly toasted buns encase a seasoned meat mixture, while the cheese on top browns to a light golden bubble. The marinara keeps every bite moist, and optional add-ins like diced green pepper or black olives add brightness and bite. Since it all bakes together, the flavors have time to meld, producing something greater than the sum of its parts. I love serving these with simple sides and watching people dig in — they’re messy in the best way.
Why You'll Love This Recipe
- Fast assembly and one-pan baking mean you can move from prep to table in under 45 minutes, perfect for weeknights.
- Uses pantry staples and a single package of slider buns, so you rarely need a special trip to the store; marinara and shredded mozzarella are the backbone.
- Highly adaptable: swap ground beef for Italian sausage or a plant-based crumble, and add vegetables for more color and nutrients.
- Great for feeding a crowd — the recipe yields 12 mini sandwiches that are ideal for parties, potlucks, or kid-friendly dinner nights.
- Make-ahead friendly: assemble, cover, and refrigerate a few hours before baking, or freeze for longer storage.
- Minimal cleanup since the skillet or baking dish handles cooking and baking stages, saving time and dishes.
I remember the first time I swapped in turkey Italian sausage for a lighter version and still got the same wide-eyed approval from my sister, who declared it "dinner and playground food at once." Those small experiments helped me learn how little you need to change to suit tastes while keeping results consistent.
Ingredients
- Slider buns: One 12-count package. Choose soft, pillowy buns labeled slider or dinner rolls; day-old buns hold up best so they don’t get soggy under the sauce.
- Meat: 1 pound ground beef or Italian sausage. I usually use 85/15 ground beef for good flavor and less fat; store-bought sweet or mild Italian sausage adds a spiced, authentic pizza profile.
- Marinara sauce: 1 cup. Any good-quality jarred marinara works; Rao's and Classico are reliable choices. If you have homemade sauce, even better — thick sauces prevent soggy bottoms.
- Mozzarella: 2 cups shredded. Buy whole-milk mozzarella for creamier melt; shred it yourself from a block for the best texture.
- Pepperoni: 1/2 cup sliced. Standard sandwich pepperoni or mini pepperoni both work; the edges crisp when baked, giving a wonderful texture contrast.
- Vegetables (optional): 1/2 cup diced green bell pepper and 1/2 cup sliced black olives. These add brightness and a briny touch; remove if serving to kids who prefer plain pizza flavors.
- Seasoning: 1 teaspoon Italian seasoning, 1/2 teaspoon garlic powder, and 1/4 teaspoon red pepper flakes (optional). These give the filling depth; increase red pepper flakes for heat.
- Olive oil: For greasing your baking dish and for browning the meat. A tablespoon is usually enough.
- Fresh basil: Leaves for garnish, optional but highly recommended for color and fragrant finish.
Instructions
Preheat the oven: Set the oven to 350°F. Preheating ensures even baking and proper melting of cheese. Use a rack in the center position so the tops brown without overbaking the bottoms. Brown the meat: Heat a large oven-safe skillet or a medium pot over medium heat with a drizzle of olive oil. Add 1 pound of ground beef or Italian sausage and cook, breaking it up with a spatula, until no pink remains, about 6 to 8 minutes. Drain excess fat if there is a lot to prevent greasy sliders. Season and simmer: Stir in 1 teaspoon Italian seasoning, 1/2 teaspoon garlic powder, and 1/4 teaspoon red pepper flakes if using. Pour in 1 cup marinara sauce and stir to combine. Let the mixture simmer gently for 3 to 5 minutes so the flavors meld and the sauce thickens slightly; look for a glossy coating on the meat. Prepare the buns and dish: While the meat simmers, slice the 12-count slider buns in half horizontally. Lightly grease a 9x13-inch baking dish or use the same oven-safe skillet if it’s large enough. Arrange the bottom halves in an even layer. Layer the filling: Spoon the meat and marinara mixture evenly over the bottom halves of the buns. Sprinkle 1 cup of shredded mozzarella across the meat layer, then scatter 1/2 cup sliced pepperoni, 1/2 cup diced green bell pepper, and 1/2 cup sliced black olives if using. Top and bake covered: Add the remaining 1 cup shredded mozzarella on top, then place the top halves of the buns back on. Cover the dish tightly with aluminum foil and bake for 15 to 20 minutes until the filling is hot and the cheese has started to melt through the buns. Uncover and brown: Remove the foil and bake an additional 5 to 10 minutes until the cheese is bubbly and lightly golden and the tops are slightly toasted. If you like extra browning, use the oven broiler for 1 to 2 minutes while watching closely to prevent burning. Cool and serve: Let the assembled sliders rest for 3 to 5 minutes to set. Slice into individual sandwiches using a sharp knife or a pizza cutter. Garnish with fresh basil leaves and serve warm.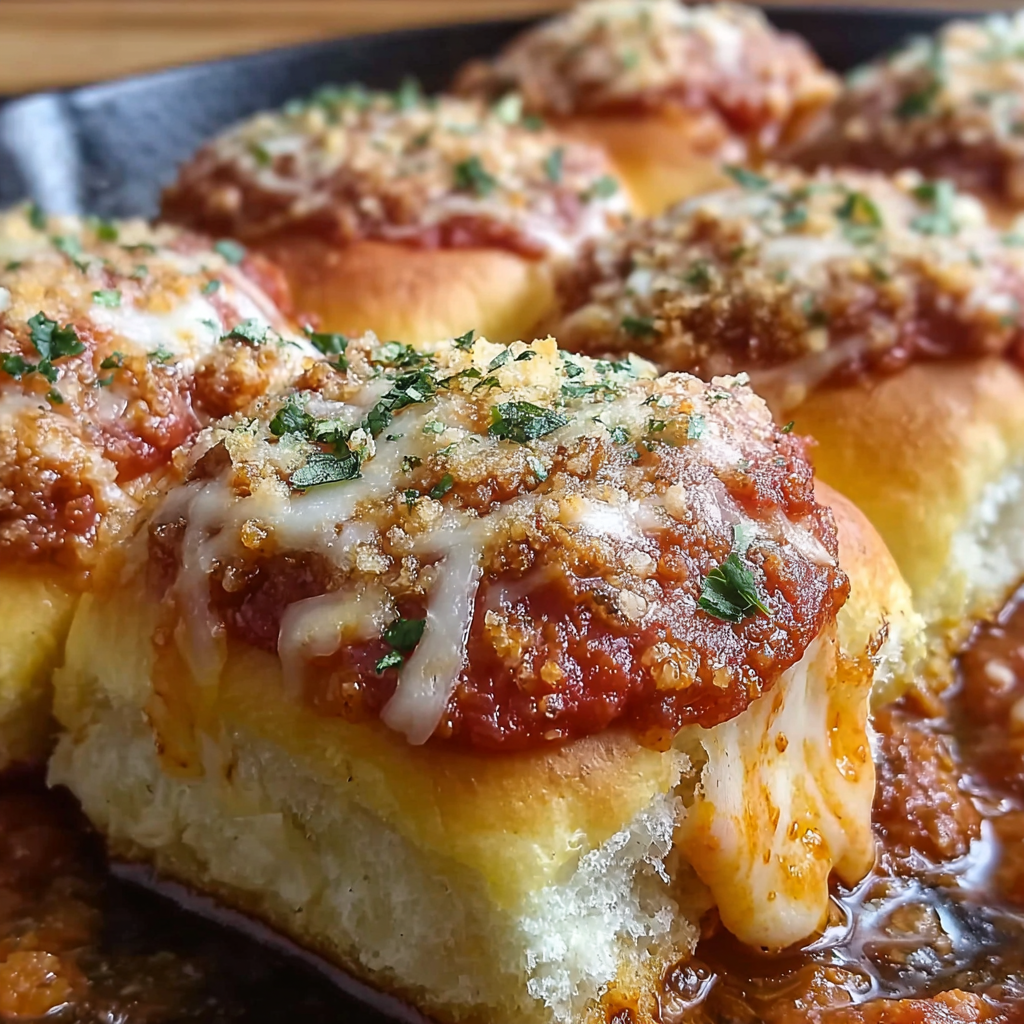
You Must Know
- These sliders freeze well for up to 3 months. Wrap the cooled, unbaked assembled pan tightly in two layers of plastic wrap and foil, then bake from frozen but add 10 to 15 minutes to covered baking time.
- High in protein thanks to the ground meat and cheese; swap turkey sausage to reduce fat and calories.
- Store leftovers in an airtight container in the refrigerator for up to 3 days; reheat at 350°F for 10 to 12 minutes or until warmed through.
- For crispier bottoms, toast the bottom bun halves in a skillet for 1 minute each before assembling.
- Use a thicker marinara to avoid soggy buns; drain watery sauces before using.
My favorite thing about this dish is how it brings people together — I once served these at a backyard birthday and guests formed a line at the kitchen counter, passing plates around and comparing which combo of toppings they liked best. The leftovers were fought over the next day, which is always a good sign.

Storage Tips
Cool leftovers completely before storing to prevent condensation and sogginess. Place individual sliders in a shallow airtight container or wrap them tightly in plastic wrap and foil, then refrigerate for up to 3 days. To freeze, wrap the entire baking tray portion or individual sliders tightly and label with the date; use within 3 months. Reheat from refrigerated in a 350°F oven for 10 to 12 minutes so the cheese remelts evenly; from frozen, bake covered at 350°F for 25 to 30 minutes, then uncover for 5 minutes to restore crispness.
Ingredient Substitutions
For a lighter version, substitute lean ground turkey or chicken in place of beef, and choose low-fat mozzarella. To make this vegetarian, use a plant-based ground 'meat' and omit pepperoni; add grilled mushrooms and artichoke hearts to boost umami. If you need a gluten-free option, swap the slider buns for gluten-free rolls and confirm your marinara is certified gluten-free. For dairy-free, use dairy-free shredded cheese alternatives and omit fresh basil garnish if sensitivity exists.
Serving Suggestions
Serve sliders with a crisp green salad dressed in lemon vinaigrette to cut through the richness, or pair with roasted potato wedges for a heartier meal. For parties, offer bowls of crushed red pepper, grated parmesan, and extra basil so guests can customize. These also work well on a buffet with toothpicks to keep sliders intact; serve alongside a tray of pickles and raw vegetable sticks for contrast.
Cultural Background
Miniaturized pizza forms like these draw inspiration from classic American adaptations of Italian flavors. While pizza originates from Naples and traditionally features a thin crust with simple toppings, the slider format is a playful American reinterpretation that emerged from the popularity of party-sized handheld foods. Combining marinara, mozzarella, and cured meats in sandwich form reflects a trend of cross-cultural comfort foods that prioritize convenience and shareability.
Seasonal Adaptations
In summer, swap marinara for a bright tomato-basil sauce and add fresh cherry tomatoes and thinly sliced zucchini. For fall and winter, incorporate caramelized onions and roasted red peppers for deeper flavors. Holiday gatherings welcome a holiday twist: use fennel-spiced Italian sausage and top with arugula tossed in lemon for a peppery finish.
Meal Prep Tips
Assemble the sliders in a baking dish, cover tightly, and refrigerate for up to 8 hours before baking to save time on the day you plan to serve. Portion individual assembled sliders into meal prep containers for grab-and-go lunches; reheat in a toaster oven to retain crisp edges. Keep extra marinara in a small container to spoon over reheated sliders if they dry out.
These Easy One Pot Pizza Sliders are proof that simple ingredients, a little organization, and a warm oven can produce food that feels celebratory every time. Gather friends, pick your favorite toppings, and enjoy the inevitable smiles.
Pro Tips
Drain excess fat after browning the meat to prevent soggy buns and greasy flavor.
Use block mozzarella and shred it yourself for a creamier melt and less moisture than pre-shredded varieties.
If your marinara is thin, simmer it until slightly reduced to avoid making the bottoms soggy.
Let the sliders rest 3 to 5 minutes after baking so the cheese sets, making them easier to slice.
This nourishing easy one pot pizza sliders recipe is sure to be a staple in your kitchen. Enjoy every moist, high protein slice — it is perfect for breakfast or as a wholesome snack any time.
FAQs about Recipes
Can I make these ahead of time?
Yes. You can assemble and refrigerate covered for up to 8 hours before baking. Add a few extra minutes to the baking time if the filling is cold.
Can I freeze the assembled sliders?
Wrap cooled, unbaked sliders tightly and freeze for up to 3 months. Bake from frozen, adding about 10 to 15 minutes to the covered bake time.
Tags
Easy One Pot Pizza Sliders
This Easy One Pot Pizza Sliders recipe makes perfectly juicy, tender, and flavorful steak every time! Serve with potatoes and a side salad for an unforgettable dinner in under 30 minutes.
Ingredients
Main
Instructions
Preheat the oven
Set the oven to 350°F and position a rack in the center to ensure even baking and proper browning of the tops without overcooking the bottoms.
Brown the meat
Heat a large oven-safe skillet or pot over medium heat with a drizzle of olive oil. Add the ground beef or Italian sausage and cook until no pink remains, about 6 to 8 minutes, breaking it up as it cooks. Drain excess fat if necessary.
Season and simmer
Stir in Italian seasoning, garlic powder, and red pepper flakes. Add marinara sauce, mix well, and simmer 3 to 5 minutes until slightly thickened to concentrate flavors.
Prepare buns and dish
Slice the 12-count slider buns in half horizontally. Lightly grease a 9x13-inch baking dish or use the oven-safe skillet and arrange the bottom halves evenly.
Assemble layers
Spoon the meat mixture over the bottom buns, sprinkle half the shredded mozzarella, add pepperoni and optional vegetables, then top with remaining mozzarella and the top bun halves.
Bake covered then uncovered
Cover with foil and bake at 350°F for 15 to 20 minutes. Remove the foil and bake an additional 5 to 10 minutes until the cheese is bubbly and slightly browned. Let rest 3 to 5 minutes before slicing and serving.
Last Step: Please leave a rating and comment letting us know how you liked this recipe! This helps our business to thrive and continue providing free, high-quality recipes for you.
Nutrition
Did You Make This?
Leave a comment & rating below or tag
@snapyrecipe on social media!
Categories:
You might also like...

5-Minute Thanksgiving Appetizers That Wow Every Guest
A fast, elegant bite for Thanksgiving: creamy cheese, bright cranberry, crunchy pecans and rosemary on crackers or baguette — ready in five minutes and loved by all.

Air Fryer Bang Bang Chicken Skewers
Crispy air-fried chicken skewers tossed in a creamy, sweet-spicy bang bang sauce — a quick, crowd-pleasing weeknight favorite.

Air Fryer Honey Butter Garlic Chicken Tenders
Crispy air-fried chicken tenders coated in a sticky honey-butter garlic glaze — quick, family-friendly, and ready in about 25 minutes.
Did You Make This?
Leave a comment & rating below or tag @snapyrecipe on social media!
Rate This Recipe
Share This Recipe
Enjoyed this recipe? Share it with friends and family, and don't forget to leave a review!
Comments (1)
This recipe looks amazing! Can't wait to try it.
Comments are stored locally in your browser. Server comments are displayed alongside your local comments.
Hi, I'm Natalia!
What's Popular

Get My 30-Minute Meals email series!
Quick and easy dinner ideas delivered to your inbox.