
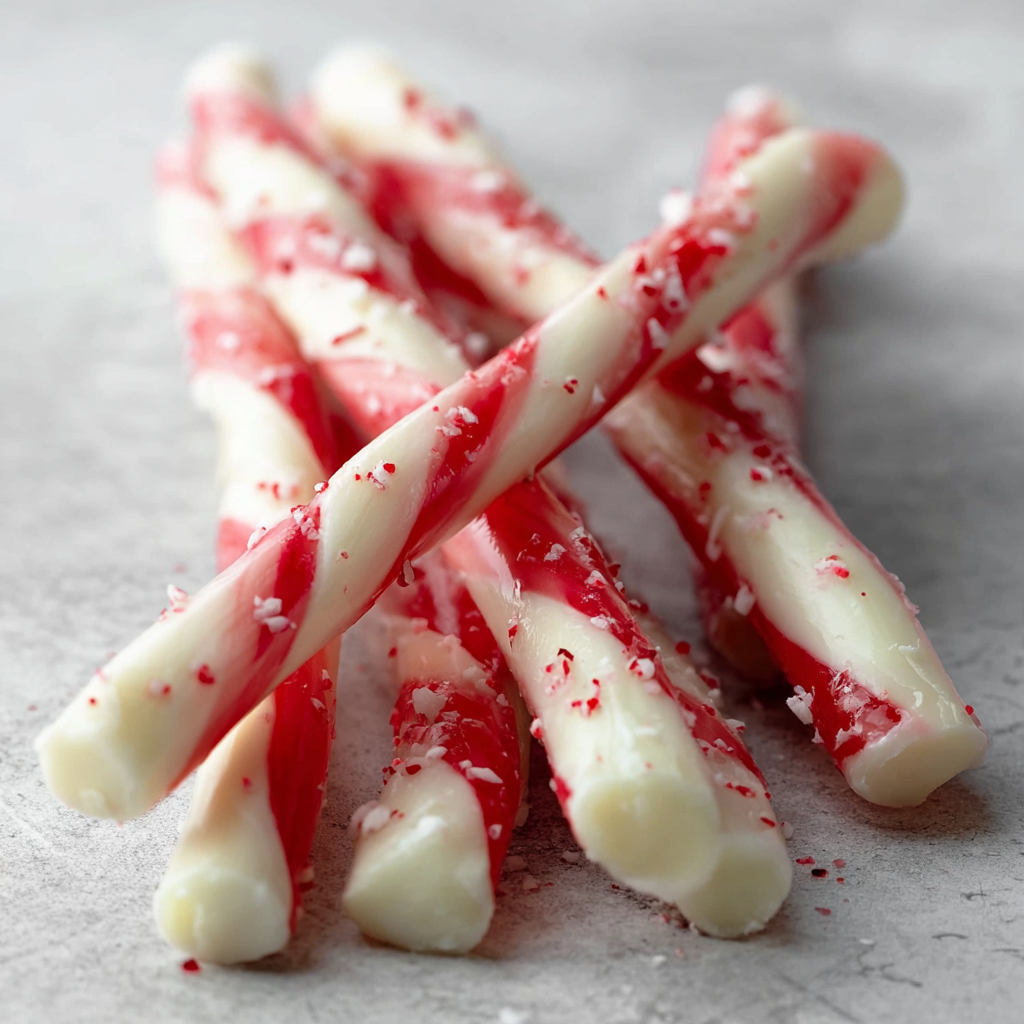
Homemade Christmas Peppermint Sticks

Crunchy, minty white chocolate treats made with crushed candy canes — perfect for gifting, stocking stuffers, or a festive after-dinner nibble.

This batch of homemade Christmas peppermint sticks was born from a late-night impulse to turn leftover candy canes into something sharable and pretty. I first made them one December after a holiday party when the candy bowl was overflowing; instead of letting the canes sit in a drawer, I crushed them and stirred them into melted white chocolate. The result was bright, peppermint-forward sweets with a clean, creamy melt from the chocolate and a satisfying crunch from the candy — exactly the kind of small indulgence that tastes like the holidays.
What makes these peppermint sticks special is their simplicity and the contrast of textures: creamy, slightly sweet white chocolate against shards of cooling candy cane that pop with peppermint oil. They set quickly in the freezer, which makes them perfect for last-minute hostess gifts or to keep on hand for unexpected company. I love that you can tailor the intensity of the mint by adjusting how much crushed candy you fold in, and that a high-quality white chocolate (I use Ghirardelli or Valrhona when I want the smoothest finish) transforms a handful of pantry ingredients into something charming and elegant.
Why You'll Love This Recipe
- Fast to make: active hands-on time is about 15 minutes and they freeze solid in roughly an hour — ready in time for guests.
- Uses pantry staples: candy canes and white chocolate are often already in the cabinet at the holidays, so no special shopping trip required.
- Customizable crunch: add more or less crushed candy to control texture and mint intensity.
- Great for gifting: the pieces unmold easily from trays and look festive wrapped in cellophane with ribbon.
- Kid-friendly assembly: simple tasks like crushing canes and filling molds make this a fun family activity.
- Minimal equipment: a double boiler (or microwave-safe bowl), rolling pin, and ice cube tray are all you need.
In my kitchen these became a holiday afternoon ritual — a tote of wrapped sticks on the counter, friends dropping by for a sip of coffee and a peppermint nibble. My niece declared them "snow candy," and I love that they travel well; I once placed a box in my neighbor's mailbox as a surprise and received a handwritten thank-you note in return.
Ingredients
- Candy canes (12): Choose classic peppermint-flavored canes for the brightest mint taste. If you can, buy hard candy canes rather than soft, chewy varieties; they crush more cleanly and provide a better crunch. I look for name-brand canes or artisan candies with simple ingredients for a pure peppermint flavor.
- Peppermint extract (1 teaspoon): A little goes a long way. Use a good-quality pure peppermint extract, not peppermint oil, to avoid an overly concentrated cooling sensation. If your extract is very strong, start with 1/2 teaspoon and taste a small scrap of chocolate before adding more.
- White chocolate, 12 ounces: High-quality baking or confectionery grade white chocolate yields the smoothest melt and gloss. Brands I reach for are Ghirardelli or Callebaut; avoid white chocolate chips labeled for baking only because stabilizers can prevent a glossy finish. Chop if using bars for quicker, even melting.
- Optional sea salt: A tiny pinch per batch balances sweetness — especially useful if your white chocolate is very sweet. Sprinkle a little flaked sea salt on top for contrast.
- Optional festive additions: Crushed red nonpareils or a dusting of cocoa nibs for texture contrast. Keep additions minimal so peppermint remains the star.
Instructions
Step 1 — Prep the candy canes: Place the 12 candy canes into a sturdy freezer or heavy-duty zipper bag. Seal tightly and use a rolling pin or meat tenderizer to crush them into small, irregular pieces. Aim for a mixture of dust and small shards so some melt into the chocolate and some remain crunchy. Set aside about 1/2 cup of pieces for sprinkling on top. Step 2 — Melt the chocolate: Set up a double boiler: bring an inch of water to a gentle simmer and place a heatproof bowl on top, ensuring the bowl does not touch the water. Add the 12 ounces of chopped white chocolate and stir frequently on low heat until completely smooth, about 6–8 minutes. Alternatively, microwave in 20-second bursts at 50% power, stirring between bursts to prevent scorching. Step 3 — Fold in peppermint and candy: Remove the bowl from heat and stir in 1 teaspoon of peppermint extract. Fold in crushed candy cane pieces gradually, 1/2 cup at a time, tasting as you go until the mint level suits you. Reserve extra pieces for texture on top. Stir just enough to distribute pieces evenly without dissolving them completely. Step 4 — Mold the mixture: Pour the mixture into a clean ice cube tray or silicone mold, filling each cavity evenly. Tap the tray gently on the counter to release air bubbles and level the surface. If desired, sprinkle reserved candy shards and a pinch of sea salt on each cavity for decoration and crunch. Step 5 — Freeze and set: Place the filled tray in the freezer for about 1 hour, or until the pieces are completely firm. Remove from the freezer and pop the peppermint sticks out of the tray. Store in an airtight container in the refrigerator for up to two weeks or freeze for longer storage.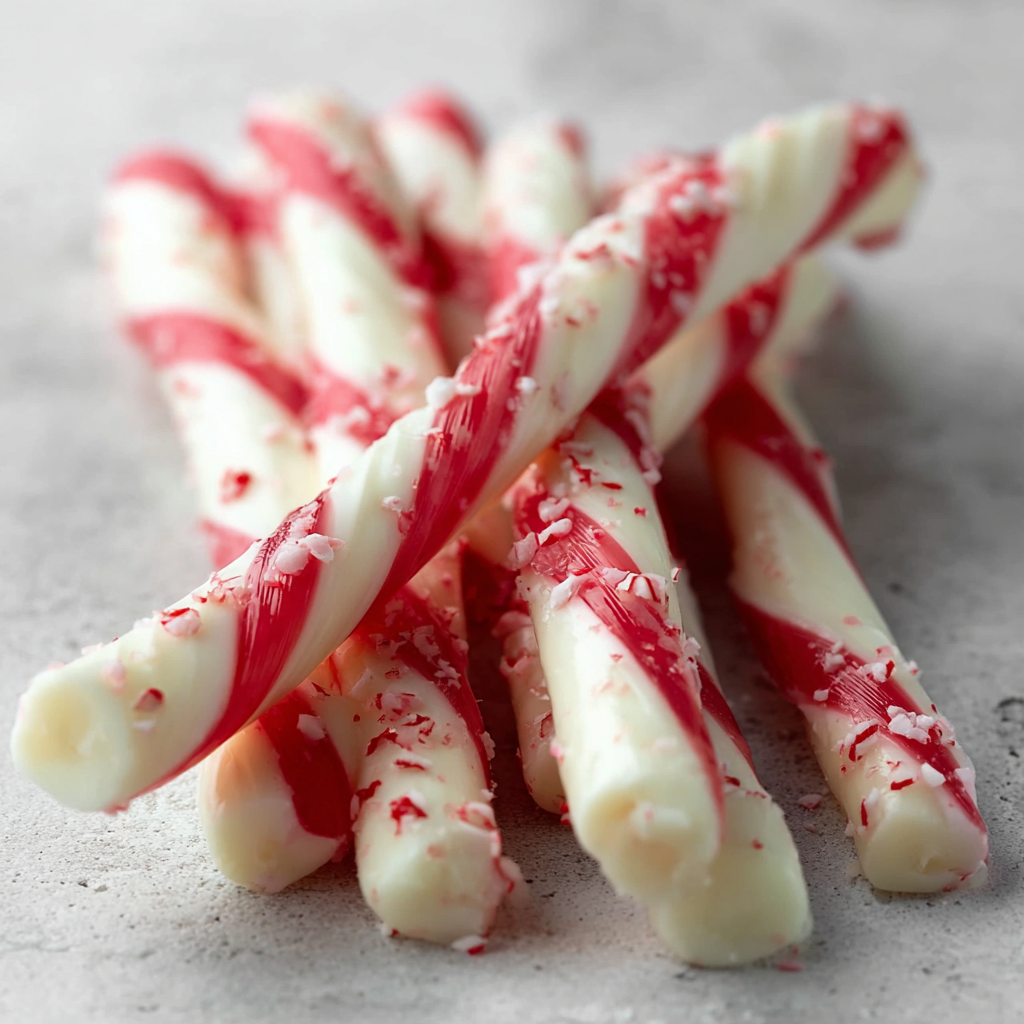
You Must Know
- These sweets are high in sugar and calories — one stick is approximately 209 kcal; enjoy them as an occasional holiday treat rather than an everyday snack.
- They freeze very well for up to 3 months; thaw briefly at room temperature before serving for the best bite and texture.
- Because white chocolate is sensitive to heat, melt slowly to prevent graininess and bloom (a dull, powdery surface).
- If your chocolate seizes (becomes grainy), add 1 teaspoon of neutral vegetable oil and stir gently to bring it back together.
- Store in a cool place away from strong odors — white chocolate easily absorbs surrounding smells.
My favorite part is wrapping a few sticks in waxed paper and tying them with twine for neighbors. The look is nostalgic: glossy white squares dotted with red shards, smelling like a winter walk. My mother once used these as place settings at a holiday dinner and everyone took one home — a tiny festive favor that sparked conversation and smiles.
Storage Tips
Store the peppermint sticks in an airtight container layered between sheets of parchment paper to prevent sticking. Keep the container in the refrigerator if you plan to enjoy them within two weeks; for longer storage, freeze them in a single layer in a sealed freezer bag for up to three months. When freezing, label the bag with the date. To serve, remove the desired number of sticks and let them sit at room temperature for 5–10 minutes to take the chill off so the white chocolate regains a silky texture without becoming soft.
Ingredient Substitutions
If you prefer a less sweet option, use high-cocoa white chocolate with less sugar or blend in 1 ounce of unsweetened cocoa butter to temper sweetness subtly. For a dairy-free version, choose a vegan white chocolate made from cocoa butter and plant-based milk solids — results are similar but may set a bit softer, so extend freezing time. You can substitute peppermint extract with crushed dried mint for a milder flavor, but use about twice as much crushed dried mint to achieve a similar brightness. Avoid using flavored hard candies with oils (like citrus) unless you want a different flavor profile.
Serving Suggestions
Serve the sticks alongside dark coffee or espresso to cut through sweetness, or place a few on a dessert platter with shortbread cookies and roasted nuts for variety. They make charming additions to holiday dessert tables or on top of cupcakes for a decorative accent. For gifting, stack six in a cellophane bag with tissue paper and tie with ribbon; include a small card suggesting they pair well with cocoa or mulled wine.
Cultural Background
Candy canes are associated with winter holidays in many Western countries; legend ties the cane shape to shepherds' crooks and the red stripe to charity or sacrifice in Christian storytelling. Using crushed candy canes in confections is a modern twist that celebrates both nostalgia and convenience — turning a simple peppermint candy into a textural element for many festive treats. This method reflects an American tradition of repurposing seasonal confections into small homemade gifts or adornments for holiday baking.
Seasonal Adaptations
In winter, emphasize the peppermint: add extra crushed candy and a sprinkle of finely grated orange zest for a bright citrus-mint twist. For Valentine's Day, substitute a portion of the candy canes with pink strawberry candies or use colored sugar sprinkles. During summer parties, swap peppermint extract for crushed spearmint and use a lighter white chocolate thinly poured into mini molds for delicate mint-dotted candies.
Meal Prep Tips
These are excellent for simple sweet prep: make multiple batches and portion into small gift bags for the month leading up to the holidays. To speed production, prep candy canes in advance and store the shards in a sealed bag at room temperature for a few days. Melt chocolate just before assembly for the best fluidity, and have trays lined and ready so you can pour continuously. Label batches with flavor notes if you try variations.
Making these peppermint sticks has become one of those small rituals that signals the holiday season in my home: easy to prepare, joyful to share, and endlessly adaptable. I hope you enjoy making a batch and discovering your own little traditions around them.
Pro Tips
Toast the ice cube tray briefly by filling it with hot water then emptying and drying before pouring to help the chocolate release cleanly.
Reserve a small amount of crushed candy for sprinkling on top immediately after pouring for the prettiest appearance.
If chocolate seizes, stir in 1 teaspoon of neutral vegetable oil to smooth it back out.
This nourishing homemade christmas peppermint sticks recipe is sure to be a staple in your kitchen. Enjoy every moist, high protein slice — it is perfect for breakfast or as a wholesome snack any time.
FAQs about Recipes
Can I freeze the peppermint sticks?
Yes — store them in an airtight container in the freezer for up to 3 months; thaw briefly at room temperature before serving.
How do I prevent the white chocolate from burning?
Use high-quality white chocolate and melt slowly in a double boiler or low-power microwave bursts. Stir often to prevent burning.
Tags
Homemade Christmas Peppermint Sticks
This Homemade Christmas Peppermint Sticks recipe makes perfectly juicy, tender, and flavorful steak every time! Serve with potatoes and a side salad for an unforgettable dinner in under 30 minutes.
Instructions
Prep the candy canes
Place 12 candy canes in a freezer bag, seal, and crush with a rolling pin or meat mallet until you have a mix of fine dust and small shards. Reserve about 1/2 cup for topping.
Melt the white chocolate
Melt 12 ounces white chocolate in a double boiler over low heat, stirring frequently until smooth. Alternatively, microwave in 20-second bursts at 50% power, stirring between bursts.
Add peppermint and candy
Remove the chocolate from heat, stir in 1 teaspoon peppermint extract, then fold in crushed candy cane pieces gradually until the mint intensity and texture are to your liking.
Pour into molds
Pour the mixture into an ice cube tray or silicone mold, tapping gently to remove air bubbles and leveling the surface. Sprinkle reserved candy shards and a pinch of sea salt on top if desired.
Freeze and unmold
Freeze the filled tray for about 1 hour until firm. Pop the peppermint sticks from the tray and store in an airtight container in the refrigerator or freezer.
Last Step: Please leave a rating and comment letting us know how you liked this recipe! This helps our business to thrive and continue providing free, high-quality recipes for you.
Nutrition
Did You Make This?
Leave a comment & rating below or tag
@snapyrecipe on social media!
Categories:
You might also like...

5-Minute Thanksgiving Appetizers That Wow Every Guest
A fast, elegant bite for Thanksgiving: creamy cheese, bright cranberry, crunchy pecans and rosemary on crackers or baguette — ready in five minutes and loved by all.

Air Fryer Bang Bang Chicken Skewers
Crispy air-fried chicken skewers tossed in a creamy, sweet-spicy bang bang sauce — a quick, crowd-pleasing weeknight favorite.

Air Fryer Honey Butter Garlic Chicken Tenders
Crispy air-fried chicken tenders coated in a sticky honey-butter garlic glaze — quick, family-friendly, and ready in about 25 minutes.
Did You Make This?
Leave a comment & rating below or tag @snapyrecipe on social media!
Rate This Recipe
Share This Recipe
Enjoyed this recipe? Share it with friends and family, and don't forget to leave a review!
Comments (1)
This recipe looks amazing! Can't wait to try it.
Comments are stored locally in your browser. Server comments are displayed alongside your local comments.
Hi, I'm Natalia!
What's Popular

Get My 30-Minute Meals email series!
Quick and easy dinner ideas delivered to your inbox.