
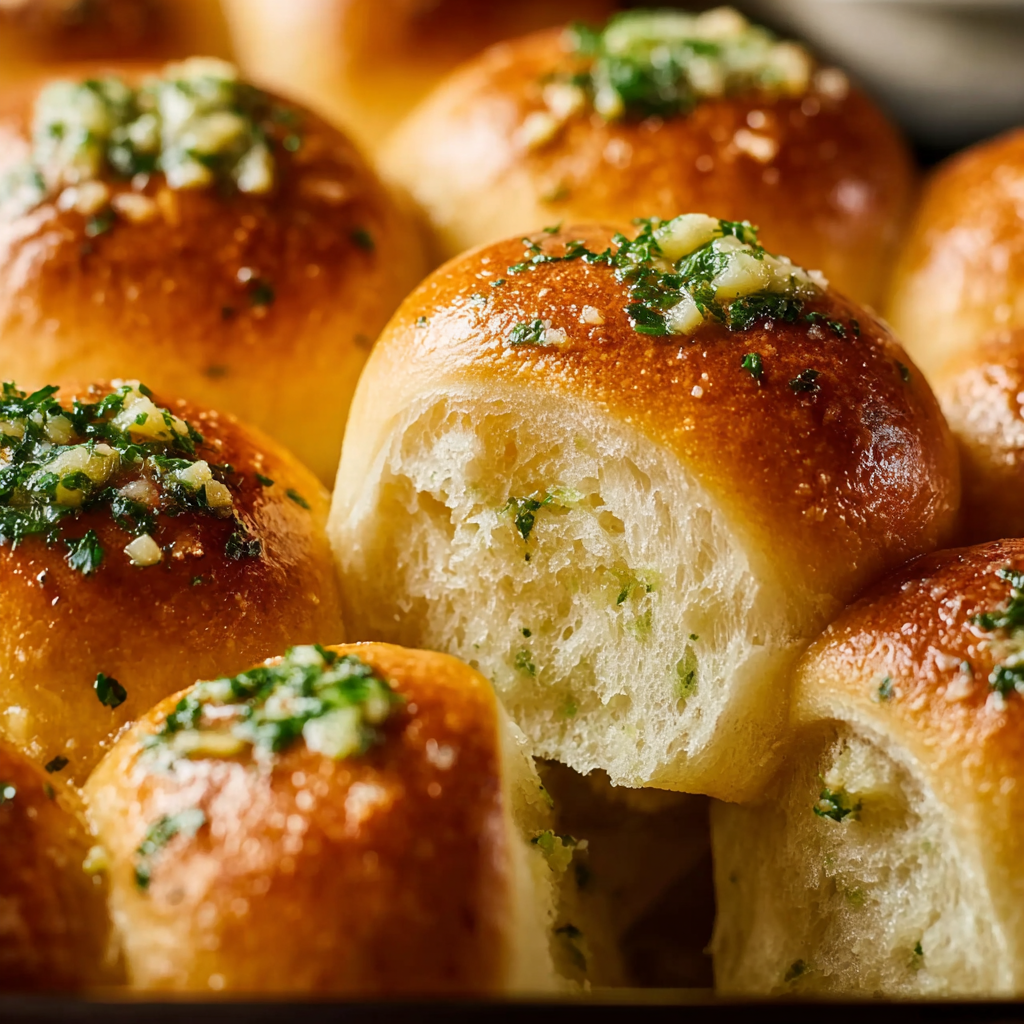
Soft & Buttery Garlic Rolls

Pillowy, buttery rolls infused with garlic and herbs—perfect alongside soups, pastas, or as a stand-alone treat. Simple yeast dough, layered flavor, irresistible finish.
This batch of soft, buttery garlic rolls is one of those dishes I make when I want the kitchen to smell like comfort and welcome. I first developed this version on a rainy weekend when pantry staples and a head of fresh garlic needed to become something more than a side; the combination of tender crumb, gentle garlic folded into the dough, and the glossy garlic-butter finish turned a simple loaf into a family ritual. Every time these come out of the oven, my partner and I trade bites involuntarily, and guests ask for the recipe long after the meal is over.
What makes these rolls special is a two-layer approach to flavor: minced garlic gently mixed into the dough so each bite has a savory backbone, and a final brush of garlic-infused butter right after baking that gives them a glossy, fragrant finish. The dough itself is enriched with melted butter and an egg, producing an airy interior with a tender crust that yields under the first pull. I love serving them warm, torn open with steam rising, but they also refrigerate and reheat beautifully for up to a few days.
Why You'll Love This Recipe
- Soft, pillowy texture every time thanks to enriched dough with butter and egg and a gentle knead that builds just enough gluten for structure without toughness.
- Twice-the-garlic impact: minced garlic folded into the dough and a garlic-butter brush after baking ensures savory flavor throughout and on the surface.
- Quick active time—about 25 minutes of hands-on work—and most of the clock is passive rising; perfect for a weekend bake or a special dinner side.
- Uses pantry staples you likely already have: all-purpose flour, yeast, milk, and butter; no specialty ingredients required.
- Make-ahead friendly: dough can be refrigerated for a slow overnight rise to deepen flavor, or the finished rolls freeze well for up to three months.
- Versatile: serve with soups, stews, roasted mains, or turn into sliders with sliced meats and cheeses.
In my experience, the family response has always been enthusiastic. My neighbor once came by for coffee and left with a dozen rolls and a request to bring them to our next block potluck. Over the years I've adjusted the garlic quantity and proofing schedule based on seasonal humidity and found small tweaks—warmer milk for colder kitchens, slightly longer knead when using stronger flours—made a big difference.
Ingredients
- All-purpose flour (3½ cups): Choose a reputable brand such as King Arthur or Gold Medal if available; all-purpose provides the right protein level for tender crumb and good rise. Measure by spooning into the cup and leveling for accuracy.
- Granulated sugar (2–3 tablespoons): Sugar feeds the yeast and adds a touch of sweetness to balance the garlic; use 2 tablespoons for savory leaning rolls, 3 for a slightly sweeter crust.
- Instant yeast (2¼ teaspoons): Convenient and reliable; can be mixed into the dry flour. If using active dry yeast, proof in warm milk first and use the same quantity.
- Salt (1 teaspoon): Finishing flavor anchor—do not skip. Use a fine sea salt for even distribution.
- Milk (1 cup, warmed): Whole milk gives the richest crumb; 2% works fine. Aim for about 100–110°F (warm to the touch) to activate yeast without killing it.
- Unsalted butter, melted (4½ tablespoons): Fat for tenderness and flavor; save a little extra for brushing. Use high-quality butter like Plugrá or Kerrygold for best taste.
- Large egg (1, room temperature): Adds richness and helps with browning; bring to room temperature to mix smoothly.
- Fresh garlic (2 tablespoons, finely minced): Fresh garlic is essential for bright aroma; avoid pre-minced jars for optimal flavor.
- Fresh parsley or herbs (3 tablespoons, chopped, optional): Adds freshness—flat-leaf parsley is classic, thyme or oregano create different herb profiles.
- For the garlic-butter brush: Unsalted butter (2 tablespoons, melted), 1 tablespoon minced fresh garlic, 1 tablespoon chopped fresh parsley, and flaky sea salt to finish if desired.
Instructions
Make the Dough: In a large bowl whisk together 3½ cups flour, 2–3 tablespoons sugar, 2¼ teaspoons instant yeast, and 1 teaspoon salt. In a smaller bowl combine 1 cup warmed milk, 4½ tablespoons melted butter, and 1 room-temperature egg. Pour the wet into the dry, stir until a shaggy dough forms, then add 2 tablespoons minced garlic and 3 tablespoons chopped parsley. The dough will be slightly sticky; that’s desirable for a tender crumb. Knead for Structure: Turn dough onto a lightly floured surface and knead for 6–8 minutes until smooth and elastic, adding small amounts of flour if excessively sticky. You’re aiming for a supple dough that springs back when pressed. Alternatively, use a stand mixer with a dough hook on medium for 4–5 minutes. First Rise: Place dough in a lightly oiled bowl, cover with plastic wrap or a damp towel, and let rise in a warm draft-free spot until doubled, about 60–75 minutes. In cooler kitchens this can take up to 90 minutes; look for a visible puff and a finger indentation that slowly fills back. Shape Rolls: Punch the dough down gently, divide into 12 even pieces (about 2 ounces each). Shape each into a smooth ball by pulling dough under itself and tucking seams underneath. Arrange balls seam-side down in a greased 9x13-inch baking pan, leaving a little space between so they can expand. Second Rise: Cover the pan and let the rolls rise until nearly doubled and touching, about 30–45 minutes. This second proof builds airy internal structure; avoid over-proofing, which can collapse the shape during baking. Bake and Finish: Preheat the oven to 375°F. Bake the rolls for 16–20 minutes until golden brown on top and registering 190°F internally. While rolls bake, combine 2 tablespoons melted butter, 1 tablespoon minced garlic, and 1 tablespoon chopped parsley. Brush the rolls immediately out of the oven with the garlic butter so it melts in and gives a glossy sheen. Sprinkle flaky sea salt if desired.
You Must Know
- These rolls are best eaten warm the day they are baked, but they store well in the refrigerator for 2–3 days or freeze for up to 3 months. Reheat at 300°F for 10–12 minutes from thawed.
- Avoid over-flouring during kneading; too much flour makes the crumb dense. Slightly sticky dough yields the softest interior.
- Using fresh garlic is crucial: it gives a bright aromatics and fresh bite that dried garlic powder cannot replicate.
- Proofing time varies with temperature—if your kitchen is under 70°F, allow more time; short on time, use a slightly warmer proofing spot but never exceed 110°F for liquids to avoid killing yeast.
My favorite thing about these rolls is the shared ritual—pulling them apart at the table, the steam releasing that garlicky perfume, and seeing everyone pause mid-conversation to savor the first bite. Over the years I’ve learned that the small details—the temperature of the milk, the timing of the second rise, the garlic quantity—make the difference between good and unforgettable.
Storage Tips
Store cooled rolls in an airtight container or resealable bag at room temperature for up to 24 hours; beyond that, refrigerate for up to 3 days. For longer storage, freeze fully cooled rolls in a single layer on a baking sheet until firm, then transfer to a freezer bag for up to 3 months. To reheat, thaw in the refrigerator overnight, then warm in a 300°F oven for 10–12 minutes covered with foil to retain moisture, removing foil for the last 2 minutes to refresh the crust.
Ingredient Substitutions
Whole milk gives the richest result, but 2% works well; for dairy-free, substitute unsweetened oat milk and replace butter with coconut oil or a vegan butter at a 1:1 ratio, noting the flavor will be different. For a richer roll, swap 2 tablespoons of milk for heavy cream. If you only have active dry yeast, proof it in 1/4 cup of the warmed milk with the sugar for 5–10 minutes before mixing into the flour.
Serving Suggestions
These rolls pair beautifully with creamy soups such as potato-leek or tomato bisque, and they make a comforting side for roast chicken or pasta. For an elevated presentation, split rolls and serve with compound butter or herb-infused olive oil. They are also excellent for sliders—fill with sliced roast beef, provolone, and a smear of horseradish mayo for a casual meal.
Cultural Background
While not tied to a single regional tradition, enriched rolls with garlic reflect a blending of European enriched-dough techniques and the global love of aromatic breads. Garlic has been used in breads and flatbreads across cultures for centuries; adding it directly to the dough is a technique that ensures flavor permeates rather than only topping the surface, a method you’ll find in many Mediterranean and Middle Eastern baking traditions.
Seasonal Adaptations
In summer, add fresh chopped basil or chives into the dough for a brighter herbal note; in autumn, stir in a tablespoon of roasted garlic purée for a mellow, caramelized garlic flavor. For holiday tables, increase butter slightly and add a tablespoon of finely grated Parmesan on top before baking for a festive crust. Adjust proofing times in humid conditions by shortening the second rise slightly to maintain shape.
Meal Prep Tips
For make-ahead convenience, prepare the dough in the evening and refrigerate after the first rise for up to 24 hours. Bring the chilled dough to room temperature, shape, and allow the second rise before baking. Alternatively, bake the rolls and freeze cooled portions; reheat in individual servings for quick workday dinners or weekend brunches.
These soft, buttery garlic rolls are a small masterpiece of simple ingredients and thoughtful technique. Share them hot from the oven and watch how quickly they become a favorite at your table—then experiment with herbs and finishing touches to make them your own.
Pro Tips
Use warm milk around 100–110°F to activate the yeast without killing it.
Slightly sticky dough yields the softest rolls—avoid adding too much flour during kneading.
Brush with garlic-butter immediately after baking for maximum flavor and gloss.
For deeper flavor, refrigerate the dough after the first rise overnight and bake the next day.
This nourishing soft & buttery garlic rolls recipe is sure to be a staple in your kitchen. Enjoy every moist, high protein slice — it is perfect for breakfast or as a wholesome snack any time.
Tags
Soft & Buttery Garlic Rolls
This Soft & Buttery Garlic Rolls recipe makes perfectly juicy, tender, and flavorful steak every time! Serve with potatoes and a side salad for an unforgettable dinner in under 30 minutes.
Ingredients
Dough
Garlic Butter Brush
Instructions
Make the Dough
Whisk together the dry ingredients and mix with warmed milk, melted butter, and egg. Add minced garlic and parsley, stirring until a shaggy dough forms.
Knead
Knead on a floured surface for 6–8 minutes until smooth and elastic or 4–5 minutes in a stand mixer with a dough hook.
First Rise
Place dough in an oiled bowl, cover, and let rise until doubled, about 60–75 minutes depending on ambient temperature.
Shape Rolls
Punch dough down, divide into 12 portions, shape into smooth balls, and place in a greased 9x13-inch pan seam-side down.
Second Rise
Cover and let rise until nearly doubled and rolls are touching, about 30–45 minutes.
Bake and Finish
Bake at 375°F for 16–20 minutes until golden and internal temperature reaches 190°F. Brush with garlic-butter immediately after baking.
Last Step: Please leave a rating and comment letting us know how you liked this recipe! This helps our business to thrive and continue providing free, high-quality recipes for you.
Nutrition
Did You Make This?
Leave a comment & rating below or tag
@snapyrecipe on social media!
Categories:
You might also like...

5-Minute Thanksgiving Appetizers That Wow Every Guest
A fast, elegant bite for Thanksgiving: creamy cheese, bright cranberry, crunchy pecans and rosemary on crackers or baguette — ready in five minutes and loved by all.

Air Fryer Bang Bang Chicken Skewers
Crispy air-fried chicken skewers tossed in a creamy, sweet-spicy bang bang sauce — a quick, crowd-pleasing weeknight favorite.

Air Fryer Honey Butter Garlic Chicken Tenders
Crispy air-fried chicken tenders coated in a sticky honey-butter garlic glaze — quick, family-friendly, and ready in about 25 minutes.
Did You Make This?
Leave a comment & rating below or tag @snapyrecipe on social media!
Rate This Recipe
Share This Recipe
Enjoyed this recipe? Share it with friends and family, and don't forget to leave a review!
Comments (1)
This recipe looks amazing! Can't wait to try it.
Comments are stored locally in your browser. Server comments are displayed alongside your local comments.
Hi, I'm Natalia!
What's Popular

Get My 30-Minute Meals email series!
Quick and easy dinner ideas delivered to your inbox.